Thursday, October 21, 2010

Herbed Cheese Balls

Today we learned about "herbes de Provence", a combination of dried herbs from the south of France consisting of rosemary, thyme, basil, savory, chervil, mint, marjoram, oregano and sometimes lavender.  It is a wonderful combination of flavors, and when added to these mild cheese, really wakes up the taste.  You can find this combination of herbs in bulk at the Eastside Olympia Food Co-op or Bucks 5th Ave. Spice Shop in downtown Olympia.  You may also simply combine any of the dried herbs from the list which you already have in your pantry.


For 24 balls, you will need:
4 oz (1 cup) cream cheese
4 oz (1 cup) chevre
6 oz (1+1/2 cup) feta 
1/2 tsp herbes de Provence
1/4 cup toasted walnuts, chopped fine
1/4 cup chopped fresh basil
ground pepper


In a bowl, mix together the cheeses and herbes de Provence until thoroughly combined.  
Form the mixture into about 24 small balls, about one and a half inches in diameter.
Place the basil and walnuts on a small plate and sprinkle with ground pepper.
  Roll the cheese balls in the mixture to cover.  


Transfer to a serving plate and cover loosely with plastic wrap.  Refrigerate for 1 to 4 hours, and allow flavors to marinate.

Wednesday, October 13, 2010

Breadsticks


These funky, crunchy breadsticks are great with dips like hummus, artichoke cheddar, or a spicy marinara.


Make this dough early in the day, in order to serve breadsticks as a dinner appetizer.  Or make the dough a day ahead, and refrigerate it until ready to use.  It will keep in the fridge for up to four days,  which means you can bake off a bit at a time, for many days of fresh, hot breadsticks with dip!  It can also be frozen for later use.  Simply thaw to room temperature before proceeding to roll and shape. 


Ingredients

1 tsp. active dry yeast
1 cup plus 2 Tbs. warm water (85°F)
1/4 tsp. granulated sugar
1 lb. (3-1/2 cups) all-purpose flour
1/3 cup olive oil; more for the finished breadsticks
Seasonings (fresh chopped herbs, grated parmesan, whatever you like)
Kosher salt for the finished breadsticks

First, make a sponge: In a medium bowl, mix the yeast, warm water, and sugar until dissolved. Whisk in 6 oz. (1-1/3 cups) of the flour until the mixture is uniform and free of lumps. Cover with plastic wrap and let it sit in a warm place until bubbly and light and almost doubled in volume, about 1 hour.


Now, make the dough: Whisk the olive oil and the seasoning mixture of your choice into the sponge until well blended. Keep mixing, and gradually add 9 oz. (2 cups) of the flour. Continue to add flour until the dough is only slightly sticky, but no longer wet. When the dough begins to cling to the spoon (or your hands) and pull away from the sides of the bowl, remove the dough from the bowl and knead by hand on a floured surface until smooth and elastic, 1 to 2 min.


 Shape the dough into a ball and let it rise in an oiled bowl, covered with plastic wrap, until about doubled in bulk, about 3 hours. Once risen, punch down the dough and get ready to roll (or refrigerate it overnight or for up to four days).


To shape and bake the breadsticks:  
(Let the dough sit at room temperature for about 1 hour before shaping it, if you are using it after refrigeration.) Heat the oven to 375°F and line several baking sheets with parchment. Roll out the dough on a floured surface into a 12x20-inch rectangle, about 1/4 inch thick. Using a pizza cutter (or a long, sharp knife), cut the rectangle lengthwise into two sections (each about 6 inches wide). Then cut each section into narrow strips about 1/2 inch wide.
 Stretch and twist each strip to almost twice its original length and arrange the strips, 1/4 inch apart, on the baking sheets.

Bake the sticks until golden and crisp, 15 to 20 min. Check them periodically as they bake, as some sticks inevitably end up thinner than others and will bake faster. They’re done if they feel firm when pinched.

Sprinkle the sticks with olive oil and kosher salt as soon as they come out of the oven. Let them cool completely before serving. They will stay fresh in an airtight container for up to 2 days.


Thursday, October 7, 2010

Fresh Salsa & Homemade Tortilla Chips

Tomato season is coming to an end!  So find some locally grown cherry,  grape or sungold tomatoes and whip up a batch of this easy, fresh salsa.
All you need is:

1 pint tomatoes
1/4 sweet onion
4 scallions
juice of 1/2 lime
juice of 1/2 lemon
1/2 Tbs. cider vinegar
1 clove garlic
1/2 small jalepeno
salt & pepper


**I ended up leaving out the olive oil.  I like the salsa better without it.**

Place all ingredients in a processor or blender.  For chunkier salsa, pulse the on button only three or four times then check.  For a thinner, sauce-like consistency, blend more.

Now let's make some tortilla chips.
Preheat oven to 375 degrees.  (Go to 400 if your oven runs low like the one in our classroom.)  
You will need:
corn tortillas
pizza cutter or knife
cookie sheets (sheet pans)
oil spray
salt

Stack tortillas into piles of three at a time, and cut into six wedges.

Spray pan, and spread slices out over entire pan.

Spray again with oil, and sprinkle liberally with salt.
Then bake for 10 minutes, checking for crispness and a golden brown color.  They may require 2-3 more minutes of baking.
Allow to cool, then enjoy with your fresh, delicious salsa!


Wednesday, September 29, 2010

Carrot Soup


This is my daughter's cookbook, and the carrot soup recipe is her favorite thing to make.

If you head on down to the Olympia Farmer's Market this week, you will be able to pick up some wonderful carrots, yukon gold potatoes, fresh cilantro, an onion, and you'll be all set to make this delicious soup.
It is a perfect start to any meal because it wakes up your senses with it's fabulous scent, beautiful color and amazing blend of flavors.  I'm so proud of those of you in class today who were brave enough to try it even though you thought you may not like some of the ingredients.  Isn't it funny how certain foods can take on a whole new life when they are cooked a certain way or matched with other flavors?  

Here's what you'll need to make this at home:

1 onion
2 potatoes
10 carrots
1 orange
1 lime
3 Tbs butter
4 cups vegetable stock
1 can coconut milk
1 bunch fresh cilantro
salt & pepper


-Melt the butter in your soup pot over medium-low heat.  Add the chopped onion and saute for 5 to 8 minutes, stirring only a few times, until they begin to brown. 
-Add the chopped carrots and chopped potatoes, and stir it all up.  Let cook for 10 more minutes, then add stock.  Stir and bring to a boil.
-Lower heat, add coconut milk and cook until carrots and potatoes are soft.

-Remove pot from heat.  Stir in juices and add cilantro.  Keep stirring to cool mixture enough to put it in the blender (or food processor).
   
               
-Blend until smooth.  Add salt and pepper to taste.
   
You may need to heat it up again if it has cooled too much at this point.  Or make it ahead of time, refrigerate, and reheat when ready to serve.
Enjoy!


Thursday, September 23, 2010

Dilly Beans

dilly beans

There is nothing like waking up your appetite with the fresh, crisp taste of a spicy pickled green bean.
You must begin with freshly picked beans, usually available in late August and early September at your local farmer's market.

You will also need apple cider vinegar, white vinegar, mustard seed, dill seed, hot pepper flakes and garlic cloves.
For 12 pint jars (tall, thin shape):
5 lb. green beans (trim to jar length)
5 cups cider vinegar
5 cups white vinegar
10 cups water
3/4 cup kosher salt
dill seed
mustard seed
hot pepper flakes (or small dried chilis)
12 cloves garlic


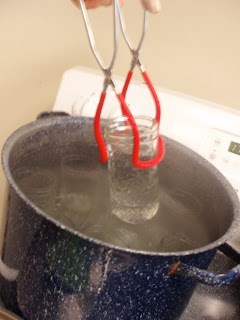
Sterilize jars and lids in large pot of boiling water with a rack at the bottom for five minutes, then place jars in a warm oven(100-180 degrees) to dry. Dry the lids with a clean towel, and set aside.
Meanwhile, in another pot, bring vinegars, water and salt to a boil.
Rinse and trim beans, then carefully fit about twenty beans in each jar.  Add 1/4 tsp. dill seed, 1/4 tsp. mustard seed, 1/4 tsp. chili flakes (or one chili), and one garlic clove to each jar.


Next, carefully pour the vinegar mixture into each jar, filling it up to 1/2 inch from the top.

Place the lid on and screw on the ring loosely to hold it in place.


Now the full jars go back into boiling water for five more minutes.


Remove from waterbath and place on cooling racks with space in between jars.  They should begin to make a popping noise as they seal.  If any of the lids have not inverted (meaning you can press down on the middle with your finger and it will move), simply place back into a boiling pot of water for 3-5 more minutes.

Your beans will be fully pickled and ready to enjoy in a week or two!
Make enough to last all winter.  These are addictive.


Thursday, September 16, 2010

Appetizers : Rosemary Skewers

Rosemary Skewers


Ingredients

  • Stalks Of Fresh Rosemary
  • Fresh Mozzarella Cheese, Cut Into 1-inch Cubes
  • Marinated Artichoke Hearts, Drained
  • Black Or Kalamata Olives, Drained
  • cherry or grape tomatoes
  • 1/2 Cup Olive Oil
  • 3 Tablespoons Balsamic Vinegar
  • Pinch Of Salt
  • Fresh Ground Black Pepper (lots!)
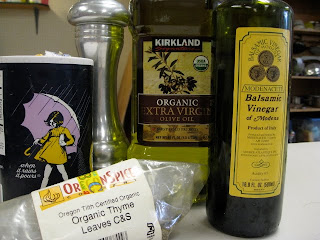
  • Sprinkle of dry Thyme 

Preparation Instructions

Strip all but 1 to 2 inches of rosemary leaves from stems. (Leave leaves intact at the top of the stem.)
Use stem to spear cheese cubes, artichoke hearts, olives, and tomatoes in whatever order you’d like.
Mix dressing ingredients until emulsified, then drizzle over the top of the skewers. Serve immediately or refrigerate for later.


Thursday, June 3, 2010

ICE CREAM

ICE CREAM
{IN A BAG!}

Ingredients:
1/2 cup heavy cream
1 Tbsp. sugar (superfine)
1/4 tsp pure vanilla extract

2 cups ice cubes
6 Tbsp rock salt

Equipment:
1 zipper-type sandwich bag
1 zipper-type freezer bag (one gallon size)
1 dish towel

SORRY!  NO PHOTOS TODAY.

pour the cream into the sandwich bag
-add sugar & vanilla
-seal bag carefully (test to be sure it's closed)
-place that bag into the larger bag
-add ice and rock salt
-shake, rock, roll, and squeeze the bag for 5 minutes
-use a towel if it gets too cold to hold
-the ice will almost completely melt, and the inner bag contents will have hardened like butter
-remove inner bag, dip in cold water quickly to remove salty brine
-dry off bag
- add chocolate chips, berries, nuts or any flavoring you like

AND NOW, FOR THE SCIENTIFIC EXPLANATION OF WHAT IS HAPPENING IN THIS RECIPE:
Ice has to absorb energy in order to melt, changing the phase of water from a solid to a liquid. When you use ice to cool the ingredients for ice cream, the energy is absorbed from the ingredients and from the outside environment (like your hands, if you are holding the baggie of ice!). When you add salt to the ice, it lowers the freezing point of the ice, so even more energy has to be absorbed from the environment in order for the ice to melt. This makes the ice colder than it was before, which is how your ice cream freezes. Ideally, you would make your ice cream using 'ice cream salt', which is just salt sold as large crystals instead of the small crystals you see in table salt. The larger crystals take more time to dissolve in the water around the ice, which allows for even cooling of the ice cream.

HAVE A GREAT SUMMER!
SEE YOU IN THE FALL.