Friday, April 16, 2010

Fancy Fruits with Honey Yogurt Dip & Chocolate Fondue


This week in class, we learned about some interesting fruits and some yummy dips to serve them with.
After cutting, the students collaborated to make colorful fruit platters.  And using two easy recipes, we dipped the fruits into tasty flavors for a healthy, simple snack.


We learned how to cut a pineapple:
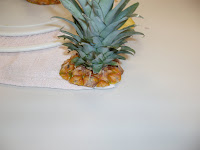
First take off the top,  using a long sharp knife.


Next, cut it in half.

Then, into quarters.


Using a smaller knife, cut down and at an angle to remove the tough skin.


Don't forget to remove the core.  


We also learned about cutting mangoes.
This is a honey mango.  It is smaller and yellower than a regular mango. 


With the mango standing, and using a small, sharp knife, we cut down one side of the core.
Then we cut off the other "cheek" as well.
And we were left with two fleshy halves.  (The core is a bit stringy and has only a small amount of edible meat on it.)

Now cut into the fruit without cutting all the way through the skin.
Invert the half,
and scrape the pieces off the skin!


As for the blood oranges and
 honey tangerines,
we simply peeled and segmented them, 
gently removing any seeds.


And the rest of the fruits we used included:
bosc pears, d'anjou pears, strawberries, and bananas.

Our tasty cold dip was made by whisking together 1&1/2 cups of plain yogurt,  1/2 cup of honey, and 1/2 tsp. cinnamon.
As easy at that!

And for the chocolate fondue:


In a saucepan, gently heat 3/4 cup of heavy cream over low heat.
Slowly add 8 oz. of your favorite chocolate.
Stir to combine, then remove from heat.
Serve while warm,  or better yet, use a fondue pot!

You can pick up a fondue set these days at almost any 
thrift store or garage sale.
I found this one for only $4!


Now enjoy all the flavor combinations,
served as a colorful, springtime treat.


Thursday, April 1, 2010

Dips - Hummus & Spicy Yogurt Cheese


Whether you serve them with tortilla chips, carrot sticks, pita triangles or any other favorite dipping device, these Mediterranean dips make a delicious and healthy snack.

HUMMUS
1 can garbanzo beans (chick peas)
1/4 cup tahini (sesame seed butter)
2 garlic cloves (roughly chopped)
3/4 tsp salt
3 Tbsp olive oil
1/2 cup lemon juice
Measure all ingredients into a food processor or blender and blend until very smooth. 


Taste and adjust flavors according to your preferences.


Spicy Yogurt Cheese
3/4 cup plain yogurt (drained through a fine sieve for a few hours or overnight)
1 cup feta cheese
2 cloves garlic (roughly chopped)
1/4 tsp cayenne
1 tsp paprika
1 Tbsp olive oil
salt & pepper


Combine all ingredients in a food processor or blender and blend until smooth.


*** If you do not like a spicy dip, cut back on the cayenne a bit.


Friday, March 26, 2010

corn tortillas


fresh, warm corn tortillas
these taste so much better than any store-bought tortillas!  you'll be hooked.


MASA =  dried corn kernels boiled with lime (calcium oxide), then ground into a fine powder.
{can be found with the Mexican foods or international aisle at most grocery stores}


2 cup masa
1 tsp salt
1&1/4 cup warm water


-Combine ingredients
-Form a ball
-Divide into sixteen pieces and roll these pieces into balls


Next, press each ball into a flat round, using either a tortilla press or a rolling pin.  But, always use parchment paper or cut rounds of plastic bag on top and beneath, so the dough does not stick to your tools.


Place tortilla into a medium hot pan and cook for 30 seconds to a minute on each side.


Enjoy these just as they are, or brush melted butter and cinnamon sugar on them for a treat.  They are perfect for an enchilada recipe, too.
  
Check out this video fresh tortillas made at home:


Friday, March 19, 2010

CREPES

This painting from 1911 depicts a French family celebrating "Crepe Day", an annual tradition held on February 2nd.  It was believed that if you could catch the crepe with a frying pan after tossing it in the air with your left hand and holding a piece of gold in your right, you would become rich that year.

Here is the crepe batter we used in class.  Very simple to make, with very basic ingredients.  Whip these up for yourself and your family any time of day.  Fill them with fruit for breakfast, cheese and ham for lunch, or Nutella for a sweet snack.  Start flipping!

You will need:  a medium sized mixing bowl (or 4 cup capacity measuring bowl w/ pouring lip)
                          a smaller bowl (at least three cup capacity)
                          a small saute pan
                          a whisk
                          a rubber spatula which can be used in a hot pan (or improvise with a fork for lifting the side of the crepe to check for doneness, before flipping)


Stir together in a larger bowl:

1 cup flour
1/4 tsp salt

Then, in a smaller bowl, beat together:

2 eggs
1 cup milk

Whisk the wet mixture slowly into the dry, beating constantly to create a smooth batter.
Let sit for at least half an hour before cooking.
Melt some butter to use when cooking the crepes, especially if you are not using a non-stick pan.  Try to use the clear part of the melted butter, rather than the whiter part which settles at the bottom.

If you want to make the apple filling we had in class:
Toss together some peeled and chopped green apples, with cinnamon sugar and lemon juice.
Saute in butter until soft.  
Cool before filling crepes.

To cook the crepes:
Heat the pan over medium-low heat.
  It is ready when a drop of butter sizzles and dances in the pan.
Use one tablespoon butter for initial pan greasing.
Then pour approximately 1/4 cup batter into pan while tilting and turning to thinly coat the bottom.


After a minute, check the bottom by lifting up an edge and looking for a slight browning.

Turn the crepe over, either using your spatula, or with a quick jerking of the wrist while holding the pan.

Keep practicing until you get the hang of it.  Like pancakes, the first one never turns out perfectly!


Can be sprinkled with powdered sugar and eaten immediately, or stacked and then filled with your choice of ingredients.


Thursday, March 4, 2010

Last Class of Session 2-

Lemon Squares

Unfortunately,  all of the photos taken in class today to be used here for instructions are currently unavailable due to technical difficulties!  Hopefully I will get them on here soon,  but for now you will only have these words to follow......

Preheat oven to 350 degrees and place the oven rack in the center of the oven.  Butter or spray an 8x8 in. square pan.  As we found today in class, the glass pans seem to work better than metal pans for this recipe.  The edges and bottom do not get as brown.

Ingredients:

Shortbread Crust:
1/2 cup (1 stick)  butter, room temperature
1/4 cup confectioner's (powdered) sugar
cup flour
1/8 tsp salt

Lemon Filling:
1 cup granulated sugar
2 large eggs
1/3 cup fresh lemon juice (approximately two large lemons)
1 tablespoons grated lemon zest *
2 tablespoons flour

Garnish:
Confectioner's (powdered) sugar


 { *lemon zest = the yellow outer rind of the lemon that contains the fruit's flavor and perfume.}


To make the crust:


In the bowl of an electric mixer, or with a hand mixer, cream the butter and powdered sugar until light and fluffy.  Add the flour and salt and beat until the dough just comes together.  Press onto the bottom of your prepared pan and bake for about 20 minutes, or until lightly browned.  Remove from the oven and place on a wire rack to cool while you make the filling.


To make the filling:


In a bowl, mix the eggs and sugar with a whisk until smooth.   Add the flour and mix to combine.  Chop the zest and add it to the lemon juice, but do not add these to the egg mixture until just before pouring onto crust.  When crust has had time to cool (10-15 minutes), add lemon to egg mixture and whisk.  Pour over crust and bake for 10 minutes.  Reduce heat to 300 degrees and bake for 10-15 more minutes, or until firm when you jiggle the pan and brown around the edges.


Cool completely before attempting to cut.  You may even refrigerate them once the pan is cool enough to handle.  Once it has set completely, use a pizza cutter or thin knife to cut around the perimeter and then cut three rows one direction and 3-4 rows the other (depending on how large you want your pieces).  It is best to periodically wipe the knife with a damp towel so that the cuts are clean.  Remember, these treats are very sweet and intense with lemon flavor.  Small pieces are preferable to large.  You can always come back for seconds.... if there are any left!